The work continues on raising a skyline in time for the Zombie apocalypse to raze it to the ground, metaphorically speaking of course! And with an extremely rare weekend free from work, with hours available to make scenery, things should be able to progress nicely.
With the basic shells completed and dry fitted earlier in the week, it was time to move on to painting the interiors black. I had to do the largest and most complicated building separately, as there simply wasn't the space to lay out all the parts on the dining table. The following photo shows the parts for the other two buildings. I quite forgot to take a photo of the large one.
 That photo was taken after the terrifying stage when the foamcore warped. I'd never seen it go so bad before in all my years of making scenery. But as you can see, left to their own devices, they soon settled down. And once they had been left for a few hours during which the decided to behave, the process of construction could begin.
 You can see the first use of my first car in the above photo. Not exactly the right.height, but a good stand in for an extra pair of hands.

 And as I begin to cut them out, the following photo should help to make sense of it all!
 A second, narrower layer was fastened beneath them, 5mm wide rather than the first one at 1cm. When this was done, it was time to begin covering over the joints with card. This also helps to give the eyes something to focus on.
 Here's the first one completed. This is a police precinct. If you look carefully you can see the narrow windows slightly higher than ground level. These are the windows for the interrogation rooms. Or, since the apocalypse began, some of the safest places to hide out...
 Another shot of the same building showing the card added to the roof.
 Of course, there was always going to be one building that pushed the boundaries. One building that had a lot more detail (and therefore a lot more work) than the others. The upper level is a case in point. Having added recessed windows (see my previous post), I felt I needed to tidy up the edges. It probably wasn't all that necessary. I'd cut the window spaces pretty well. But I wanted to make sure the edges were properly smooth. And the only way to do that was to edge it with card. The following photo shows this work in progress. Time consuming, but worth the effort.
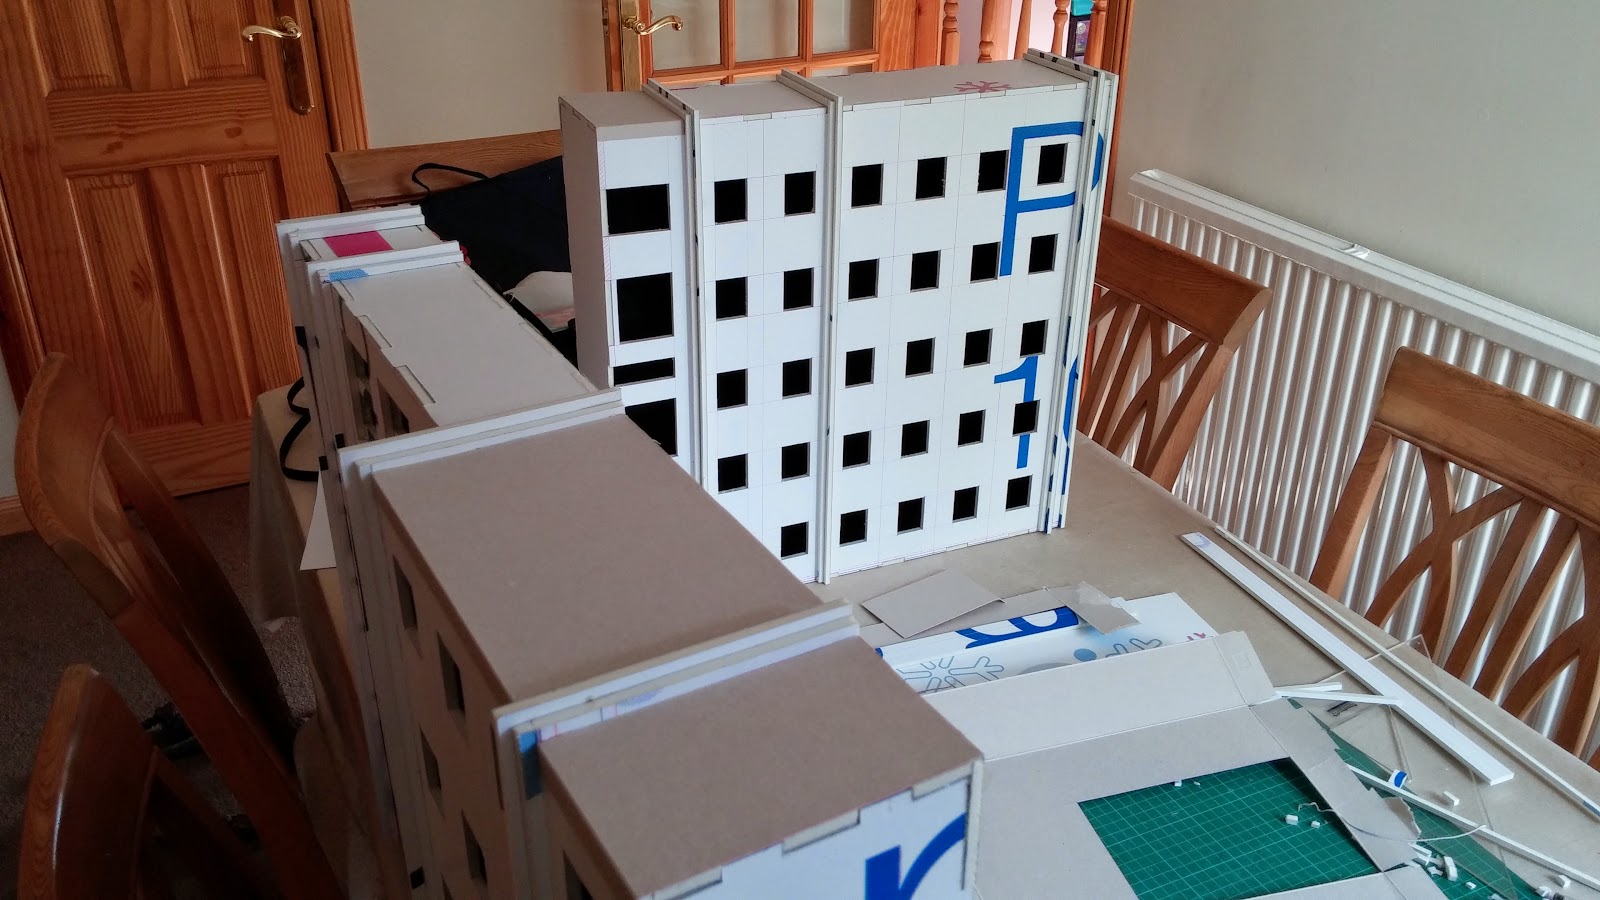
 Here's the largest and most complicated building ready for painting. It took most of the day to achieve this, but as far as I am concerned the result is well worth the effort.
 Again, a close up of the window recesses, showing the card edging in place.
 When you are making buildings this big, you encounter new problems. Mine came today in the form of the roofs. I normally cover them with card from my cereal packets. But at this size, they don't make cereal packets big enough. Trust me, I've searched for them! So to make do I have had to ad another layer of foamcore. This has raised the roof section by 5mm, but this causes no problems of note.
 I was delighted to have been able to achieve so much, and so spent the evening making traffic lights and lamp posts. I'd had a look on the interweb, but hadn't found anything that had caught my eye. Well, truth be told, there was one company I was interested in. They produced plastic moulded traffic lights and lamp posts in O guage. But they only ship to Canada and the USA. No use at all for those of us on the other side of the pond.
So instead, I set about scratch building them with bamboo skewers from my stash. I decided to make the lamp posts 7 inches tall, filing a circular groove in one end to take the smaller 2 inch bar. I cut a notch out of these smaller bars, a quarter inch in from each end.
 To these I stuck small rectangles of card measuring three eighths of an inch by three sixteenths of an inch. You can see the finished article here.
 The traffic lights were constructed in a similar way. These were made five and a half inches tall with a groove filed into them one quarter inch from the top. The horizontal beams were cut at seven inches with the groove for connecting with the vertical post an inch in from one end.
 The real fiddly bit was making the traffic lights themselves. These were small pieces of cereal packet card measuring 7mm x 20mm. The hardest part was deciding how to represent the lights themselves. I decided to use a narrow straw from a Capri-Sun drink, cut to shape. Very fiddly to cut. Even more fiddly to position on the card before the glue dried. But I'm really happy with the result. Have a look for yourself:


 And if you want to see them in all their scale glory next to the buildings themselves, then prepare yourself...
 Oh my, this is going to be EPIC!!!!!!!!!

With the basic shells completed and dry fitted earlier in the week, it was time to move on to painting the interiors black. I had to do the largest and most complicated building separately, as there simply wasn't the space to lay out all the parts on the dining table. The following photo shows the parts for the other two buildings. I quite forgot to take a photo of the large one.
Once the buildings had been assembled, work began in earnest on those protruding cornice like things. I'd use the proper name for them if I knew what it was! Anyway, here they are drawn onto some foamcore in a staggered formation.
So instead, I set about scratch building them with bamboo skewers from my stash. I decided to make the lamp posts 7 inches tall, filing a circular groove in one end to take the smaller 2 inch bar. I cut a notch out of these smaller bars, a quarter inch in from each end.
And before I forget, here's the gang with the wonderful car I got from Poundland. You'll never guess the price! It's 1:43 scale and I think looks just right sat beside Alec, Jenny, Gus and Baz. Why didn't I buy more since they had a shelf full of them? Simply because they had one design. In one colour.
Comments
Post a Comment