I'm delighted to be able to give you an update on one of my new(ish!) modular terrain boards! If you haven't seen the journey so far, you can catch up with part one
here where you can learn how all this happened, and the second part is
here. To give credit where it's due, my approach to the water section of this board comes from the excellent tutorial from marklinofsweden which you can see
here.
As you can see in my pictures, I've upgraded my toolkit with the addition of a Spongebob Squarepants table cloth! Yes, it's away with the old cut up black bin liners, and a big hello to a plastic tablecloth that my better half came across and suggested I use. And as always, her idea was brilliant. not only does it do the job so much better than the bin bags of yore, it actually puts a smile on my face every time I use it!
So what are we looking at, exactly? Well apart from Spongebob, Sandy and Patrick, this is my two-foot square modular terrain board which is now well and truly dry. After all the making, the time had come to add the decoration! You'll notice I've got it sat on two shoe boxes. Not only does this elevate it to a more workable height when standing up, it makes my painting and flocking a lot easier.
I decided to begin by painting the ground section with my brown emulsion. This comes from a tester pot I purchased at B&Q. It's called Aged Cognac. I thought it looked a good mud colour.
It's important to make sure that every nook and cranny is covered.
This is best achieved by looking at it from every angle. I then painted the edges of the board with a black emulsion. This was also from a tester pot I purchased at B&Q. And it doesn't have a daft name like the last one I mentioned. You could go mad looking through all the shades they offer to find a black, but there isn't one. if you want a black emulsion, just ask them at the mixing station. Black is a colour they can do without the need for one of those card squares bearing stupid names!

And then, once the emulsion had been given the necessary four hours to dry, I plucked up the courage to paint the water section. I followed marklinofsweden's instructions and used four colours of acrylic that I had in the house that were closest to the shades he named: white, cinnamon brown, black and thicket. I squeezed out dollops of the colour onto my palette and applied them without any water to my board. Nervous that they might dry out, I only paused briefly to take the following photograph of this stage.
I then took a clean brush and a pot of clean water and applied the resultant wet brush to the paint, making sure that I created smooth blends between each shade. My fears of failure were soon washed away as I began to enjoy seeing the magic blending take place before my very eyes! Here are some photos of the finished blending.
The paints are all matt, they just look gloss because they are so wet!
And as is so often the case with this build, I had to leave the board overnight to dry out.
Fast-forward to the next available day, and I began to add my flock. Why did I choose to do this net? Let me explain!
This is definitely a board of two halves. Or a quarter and three-quarters if you want to be a bit more accurate! Each part has a very distinct approach. One part needs to be shiny. The other needs to be matt. The land will have layers of flock applied in sequence, working, quite literally, from the ground up. Once that's all done, I'll apply a coat of Woodland Scenic's Scenic Cement. This is a wonderful project that you spray in a mist over the completed terrain. It soaks into the various flocks and foliage and through them into the baseboard itself. It makes everything stay in place. And best of all, it dries with a matt finish.
That, of course, is no good if you've just spent a few days applying varnish to the water. So, as much as I am keen to work on the water effect, I need to do the flocking first.
It's best to cover a large area by breaking it down into smaller sections. If you don't do this, the glue you are using will lose its tackiness before you cover the whole area. I'm using some half decent PVA glue from Poundland. I know it sounds rubbish compared to the fancy brands such as Evo-Stik which you can get from the likes of B&Q, but this one works fine on my bases and buildings, so I'm quite literally sticking with it on this build.
It took quite a while to make sure I reached every nook and cranny, but here's how it looked when the blended turf had been applied. I don't know what method professionals use, but I tend to scatter it from a few inches above the surface with an action that looks like some poncy chef adding seasoning to his dishes.
With this done, I left it overnight o make sure it dried properly. The next day I stood the board on its side at an obtuse angle and tapped it gently. I turned it and did the same on all four sides. This meant that any excess flock fell away and landed on my Spongebob cloth. I then used a large brush to sweep it all up and put it back in its tub. Waste not, want not!
The next stage was to apply the Green Blend. This was a much longer job than the brown. Again, you want to leave at least four hours before trying to do anything else.

And once again, it's important that you tap off the excess flock as I explained above. working in this way makes the process take a lot longer than mixing the two colours as you go. Believe e though, this way you can clear away each colour n turn and return the left overs back to the tub from which it came. if you don't do this you'll be left with a messy mix of different scatter. I've done that before. You end up with extra pots of stuff that looks nothing like your original colours. And if you are daft enough like me to try and use it, you end up with boards that look a completely different colour to the others that you did. it sounds slightly strange, but I can assure you it is both true and deeply, deeply infuriating. So don't do it! cutting corners like this will cost you a lot of money. And infuriate you in the process.
With the base layers done, we come to this morning, which held the promise of an uninterrupted day of potential. And boy did I carpe that diem, let me tell you!
This was a long, laborious job. But I loved it! It began by applying small amounts of PVA on top of the green blend.
And then applying my Noch Spring Grass. With a pair of tweezers, as you can see in this next photo.
My water jar is nice and tall and its lid was perfectly placed to be my glue palette!
Of course, when it came to the larger areas, I did allow myself to go a bit silly with my glue squeezing...
...which was a fun way to get to work on a section at a time. Obviously, I'm using my brush to gently move the PVA around. you don't want to push it into the blended turf as you'll just make it come off.
And here's the same section with the flock applied.
As the morning progressed, the static grass began to creep its way around the board. What you can see here is almost three hours worth of work.
Then the moment struck. I ran out of my Static Flock.
Thankfully though I had purchased a small bag a few weeks ago as I had been expecting this to happen.
That small bag filled my tub nicely and I was able to carry on...
And after a lot of fun (and a few cramps in my fingers from holding the tweezers for so long!) the board looked like this...
Having left the flock to dry for a few hours, I removed the excess static grass and returned it to the tub for the next project. I then began to apply medium green and dark green coarse turf in random patches.
You can see in these photos the little dabs of glue I have applied.
And here I am adding a few more!
And then adding the coarse turf.
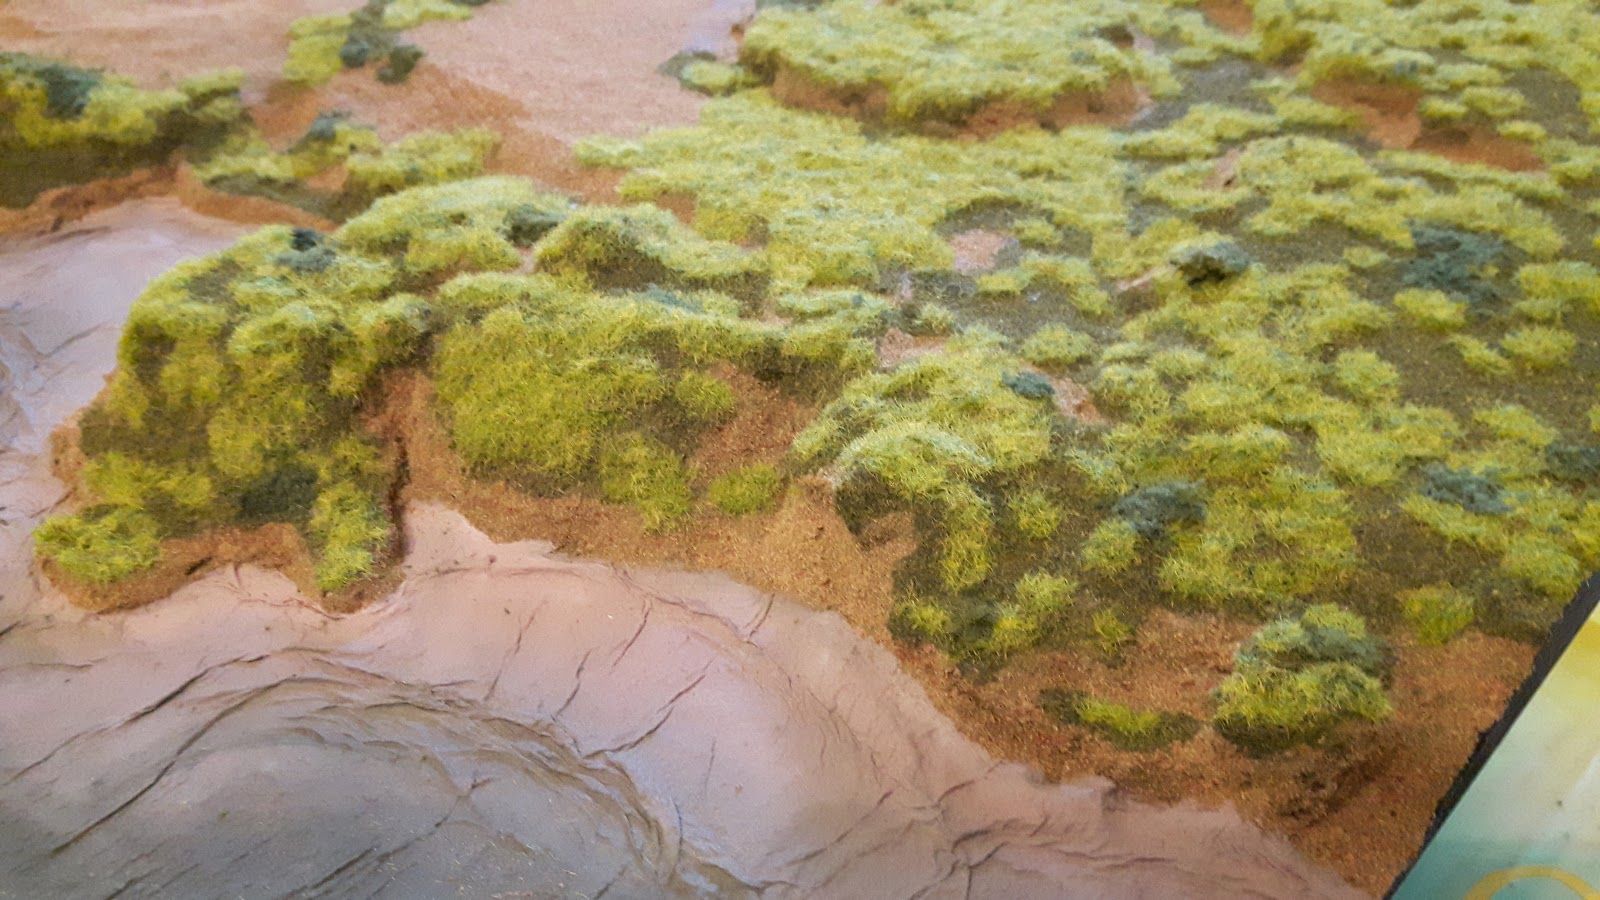
Now, when you apply your flock in successive layers like this, you build up the terrain nicely as it appears in real life. However, there is one drawback. You end up with some unnatural contours between the layers on your board. These don't look natural, as you can see in the next photo.
Thanks to the Scenic Cement though, it doesn't have to be this way! I apply some Green Blend Turf along these unsightly edges. I think you'll agree it looks a lot more natural like this.
With this done, I take my brush and make sure that there is no flock on the water sections. I don't want it glued in place with my next stage! Then I apply a light misting of Woodland Scenic's Scenic Cement over the board.
Look, it's like a morning dew on the grass...at half past six in the evening!
And here's the finished article!
This needs left alone over night to dry.
The next step will be to apply the layers of varnish to the water.
Thanks for stopping by!


Comments
Post a Comment