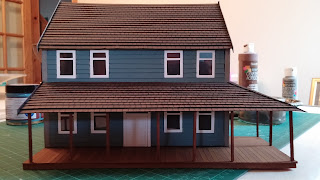
So, did I manage to complete this build before our game last night?
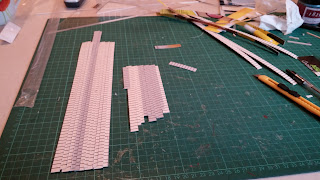
I began early in the morning, measuring out the strips I'd need to shingle the roof. I was that keen to get on with the build, I confess I ended up making a few more than I needed.Here's the porch roof sections, ready and marked for the shingles. And here's the roof drying out.
The next job was to paint the underside of the roof sections in black.
I then attached them to the Ranch, resting them across the support struts. After that I edged the joins with 5mm strips of card.
This is probably the most satisfying part of the build for me, as I was able to line up the rows of shingles nicely round the roof corner.
Then I began the rather painstaking job of painting the roof. First up, a very dark mix of black and brown to act as a base coat. That was the easy part. Then I had the joy of painting each individual shingle. Considering each row has either 40 or 41 shingles, you'll appreciate how time consuming a process this was.
The first side of the roof took around 50 minutes to paint.
It wasn't much less to paint the porch roof...
And another 50 minutes or so on the other side of the roof. You can't hurry this process, and you have to take a few minutes to blink your eyes to refocus them every so often!
Once this was done, I mixed a black wash and applied it to the top part of each row of the shingles. As this dries, it adds a nice shade. I find this process a good way of adding definition to the roof without having to shade each shingle individually. Which would be pure madness!
And so, without even enough time to put together a blog post, I was able to complete the Ranch with a few minutes to spare before setting the board for our game.
Which looked like this:
There were times I wondered if I'd be able to make the Ranch in time. To be honest, I almost didn't. But I'm really, really pleased with the result, and it made a wonderful centrepiece to last night's gaming table. I'll post a report of the game soon.
A sincere thank you to everyone who followed the progress of this build!


Comments
Post a Comment